
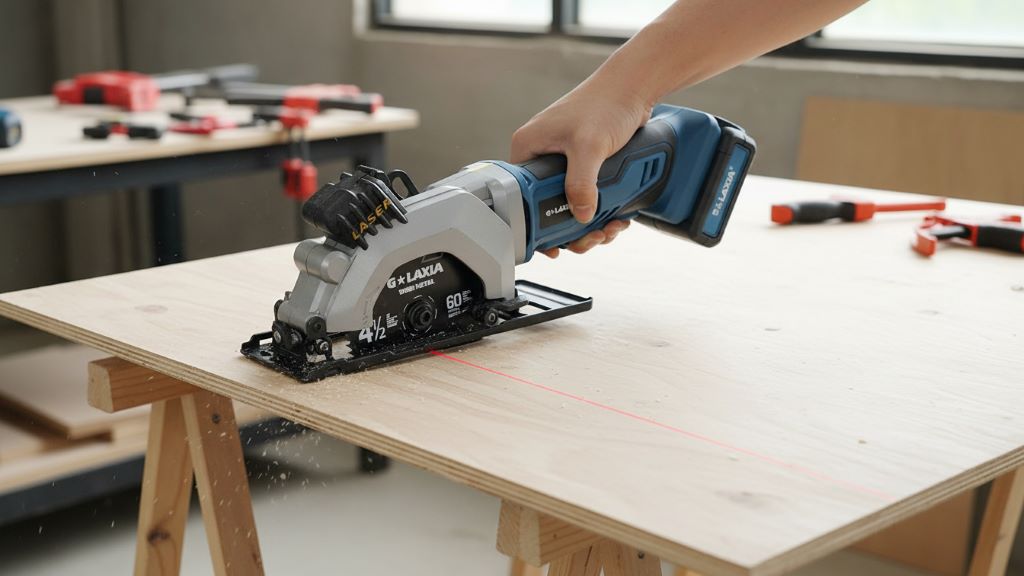

Mini circular saws solve a specific problem: full-size saw power feels like overkill when cuts happen in tight spots, on installed trim, or on small sheets where control matters more than brute force. G LAXIA’s mini circular saw targets that “precision-first” niche with a compact design, laser guidance, and a spec sheet that fits common DIY and light-pro job needs. If you came here for the technical specs plus real-world context on what those numbers mean, this guide breaks it all down clearly and practically.
What the G LAXIA Mini Circular Saw Is (And Who It’s For)
A mini circular saw gives you circular-saw cutting geometry in a smaller, more maneuverable body. That design helps when a jigsaw wanders, an oscillating tool burns through blades, or a full-size circular saw feels too heavy to guide confidently with one hand.
This saw works best for:
- DIY remodeling and home projects (shelving, flooring underlayment, panel cuts).
- Trim carpentry touch-ups (cutting boards to length, notching, controlled plunge work).
- Shop tasks where portability and quick setup beat table-saw precision.
It’s not the ideal tool for:
- Thick hardwood ripping all day.
- Structural framing production cuts.
- Long, perfectly straight sheet goods ripping without a proper track/guide setup.
According to industry experts, the best results come when you match tool size to cut type—small saws excel at controlled, medium-duty cuts, not heavy continuous ripping.
G LAXIA Mini Circular Saw: Specifications (What the Numbers Mean)
This section translates the spec sheet into practical expectations. Based on manufacturer-style documentation for a mini circular saw model with the same core configuration, these are the key published specifications: 705W input power, 3500 RPM no-load speed, 115 mm blade size, and maximum cutting depth of 42.8 mm at 90° and 28 mm at 45°.
Core performance specs
- Blade size: 115 mm (commonly marketed as 4-1/2″).
Why it matters: A 115 mm blade keeps the tool compact, but it limits depth compared to 7-1/4″ saws.
- No-load speed: 3500 RPM.
Why it matters: Higher RPM can improve cut cleanliness in sheet goods and softwood, especially with the right blade.
- Input power / power rating: 705W (in manufacturer-style documentation).
Why it matters: Power rating influences how easily the saw maintains speed under load—important when cutting denser wood or thicker material.
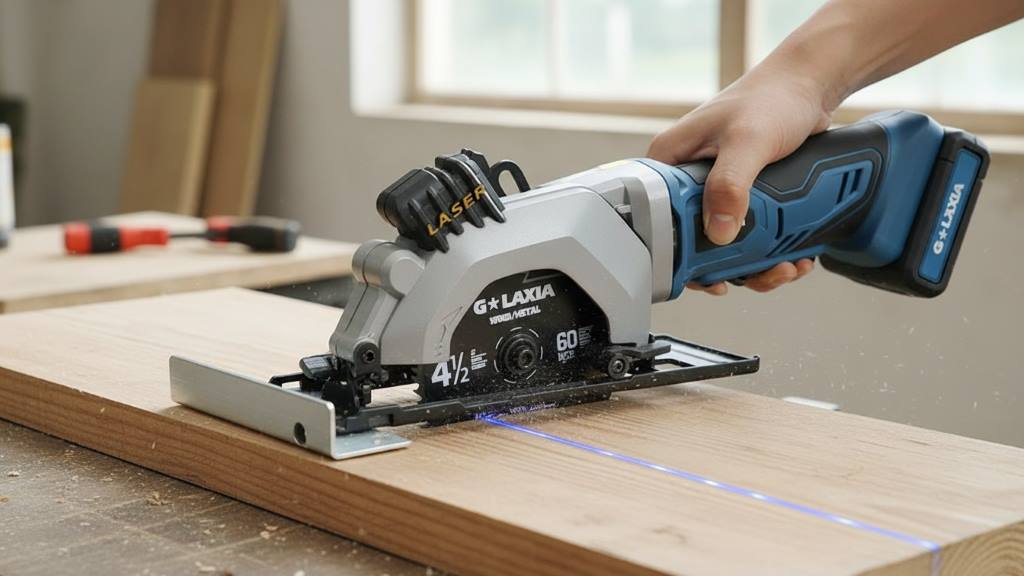
Cutting capacity specs
- Max cutting depth at 90°: 42.8 mm (about 1-11/16″).
- Max cutting depth at 45°: 28 mm (about 1-1/8″).
Why it matters: If you plan to bevel-cut thicker boards, the depth drops fast at 45° (a normal tradeoff for circular saws).
Angle range and bevel control
Manufacturer-style guidance for this mini saw format typically supports:
- Bevel adjustment: 0° to 45°.
Why it matters: Great for chamfers, bevel-edge joining, and trim-style angles—within the depth limits.
Design and Features: What You Actually Get
Mini saws live or die by ergonomics and guidance features. Based on manufacturer-oriented documentation for this saw format, the tool includes a rip guide, dust extraction port, vacuum adaptor, bevel scale/bracket, depth guide/clamp lever, spindle lock, and a built-in laser component.
Laser guide: helpful, not magic
A laser can speed alignment on short cuts and repeat tasks. However, professionals generally treat laser lines as a “rough aim assist,” not a substitute for marking and checking your actual blade kerf. For best accuracy:
- Mark the cut line clearly.
- Do a short test pass on scrap to see where the blade actually tracks relative to the laser.
- Re-check alignment after blade changes.
Rip guide: underrated for straight cuts
A rip guide helps you run parallel to an edge for repeatable straight cuts. It’s most useful on narrow boards and small panels where clamping a long straightedge feels slower than the job requires.
Depth adjustment: the safety-and-quality lever
Based on manufacturer guidelines, blade depth should not exceed about 1/4″ below the material being cut. That setting reduces kickback risk and improves cut efficiency because the tooth angle engages the wood more cleanly.
Blades: Choosing the Right One for the Job
Blade choice determines cut quality more than most people expect. Manufacturer-style documentation for this saw format commonly references multiple blade types, such as:
- TCT (carbide-tipped) blade for wood, plastic, and other softer materials.
- HSS blade for aluminum and other non-ferrous thin sheet metal.
- Diamond blade for tile/concrete-like materials.
Practical blade selection tips (professionals follow these)
- Use a dedicated wood blade for wood and laminates; it stays sharper and cuts cleaner.
- Use the correct blade type for tile or masonry—never force a wood blade through tile.
- Replace or sharpen blades as soon as feed pressure increases; forcing the saw increases heat, wandering, and kickback risk.
Also, confirm arbor compatibility and blade thickness before buying replacements—mini saws can vary.
What Materials Can It Cut Well?
A mini circular saw shines when you keep expectations realistic and match blade + technique to the material.
Best-use materials
- Plywood and OSB (especially for short crosscuts and small rip cuts).
- Softwood boards (pine, fir) up to the depth limits.
- Laminate flooring underlayment and similar sheet materials (use the right blade).
Materials that require extra care
- Hardwood: possible in thinner stock, but use a sharp blade and steady feed.
- Plastics: can melt if you feed too slowly; use the correct blade and avoid heat buildup.
- Tile/masonry: only with the appropriate diamond blade and controlled technique.
According to widely accepted industry standards, clean cutting comes from correct blade type, correct speed for the material, and stable support under the workpiece.
Setup and Use: Step-by-Step for Cleaner, Safer Cuts
Based on manufacturer guidelines for this mini saw format, follow this workflow to improve safety and results.
1) Prep the workpiece correctly
- Support the material so the offcut can fall away without pinching the blade.
- Clamp the workpiece whenever possible.
- Keep the cut line clear of cords and debris.
2) Set depth the smart way
- Set blade depth so teeth extend only slightly below the material (about 1/4″).
This reduces binding and kickback risk while improving efficiency.
3) Use guides for accuracy
- Use the rip guide for repeatable parallel cuts.
- For longer straight cuts, clamp a straightedge and run the base plate against it.
4) Start and feed correctly
- Let the saw reach full speed before contacting the material (manufacturer-style instruction).
- Push forward steadily; don’t twist the saw.
- If it binds, stop and reset—never yank it backward through the kerf.
5) Pocket/plunge cuts: only when necessary
Manufacturer-style documentation warns that pocket cuts can be hazardous because they require manual control of the lower guard during entry. If you must do it:
- Retract the guard carefully.
- Start with the front of the base plate flat on the work.
- Bring the blade into the material under full control and keep cutting forward only.
Related:
Ryobi One+ Tools Breakdown: Is the Circular Saw Worth the Hype?
Milwaukee Tools and the “Woke” Allegations: A Deep Dive
Dust Control: Small Tool, Big Difference
This saw format includes a dust extraction port and vacuum adaptor, which matters more than most beginners realize. Dust control:
- Improves cut visibility.
- Reduces cleanup time.
- Lowers airborne particles—important for MDF, plywood glue lines, and treated materials.
As recommended by professionals, connect a shop vacuum whenever possible and wear proper respiratory protection, especially with engineered wood.
Maintenance and Longevity Tips
Mini saws stay accurate when you keep them clean and tight.
Do this regularly
- Brush/blow dust out of vents (manufacturer-style maintenance guidance suggests compressed air when available).
- Inspect the guard for free movement.
- Check the base plate for pitch buildup that can drag and skew cuts.
- Change blades early—dull blades “feel” like low power and cause wandering.
Avoid this
- Don’t use aggressive solvents on plastic parts.
- Don’t run a blade that wobbles or seats incorrectly.
- Don’t store it with tension on the cord in a way that kinks it.
Buying Tips: What to Check Before You Commit
Mini circular saw listings can vary. Before purchasing, confirm:
- The blade size (115 mm / 4-1/2″) matches your replacement blade availability.
- The power rating meets your workload expectations (especially for hardwood).
- The included accessories match your needs (rip guide, vacuum adaptor, extra blades).
- Maximum depth fits your common materials (e.g., 2x lumber will exceed capacity for many mini saws).
According to industry experts, the “best” mini saw is the one that matches your most frequent cuts—not the one with the biggest numbers.
FAQs
What is the maximum cutting depth?
Manufacturer-style specifications list a maximum cutting depth of 42.8 mm at 90° and 28 mm at 45°, which fits many sheet-goods and board tasks but not thick framing cuts.
What blade size does it use?
The published blade size in manufacturer-style documentation is 115 mm (commonly sold as 4-1/2″).
Is the laser guide accurate enough for finish work?
A laser helps with alignment, but professionals still rely on marked lines, test cuts, and physical guides for finish-grade accuracy—especially after blade changes.
Can it cut tile or concrete board?
This saw format can handle tile-like materials only when fitted with the correct diamond blade and used with careful technique. For frequent tile work, many professionals prefer dedicated tile saw solutions.
How do you reduce kickback risk with a mini circular saw?
Set correct blade depth (only slightly below the material), support the work to prevent pinching, keep a firm grip, and never twist the saw in the cut—based on manufacturer safety guidance and widely accepted industry standards.
What’s the most common reason for rough cuts?
A dull or wrong blade causes tear-out, burning, slow feed, and wandering more often than “lack of power.” Replace blades sooner than expected.
Conclusion
G LAXIA’s mini circular saw category makes the most sense when you want controlled cuts, simple guiding features, and practical depth for sheet goods and smaller boards—without hauling a full-size saw. Use the right blade, set depth correctly, and rely on guides for repeatable accuracy, and this compact saw can become a go-to tool for fast, clean project work. If this overview helped, save it for your next blade change or setup—and consider building a simple cutting guide jig to get table-saw-like straightness from a handheld tool.