The urge to tackle DIY projects can be strong, fueled by a desire to personalize your space, save money, or simply experience the satisfaction of creating something yourself. But before diving headfirst into a renovation frenzy, it’s crucial to equip yourself with the essentials. This guide serves as your DIY SOS kit, introducing you to the fundamental tools and techniques every beginner needs to navigate common household projects with confidence.
Building Your DIY Toolbox:
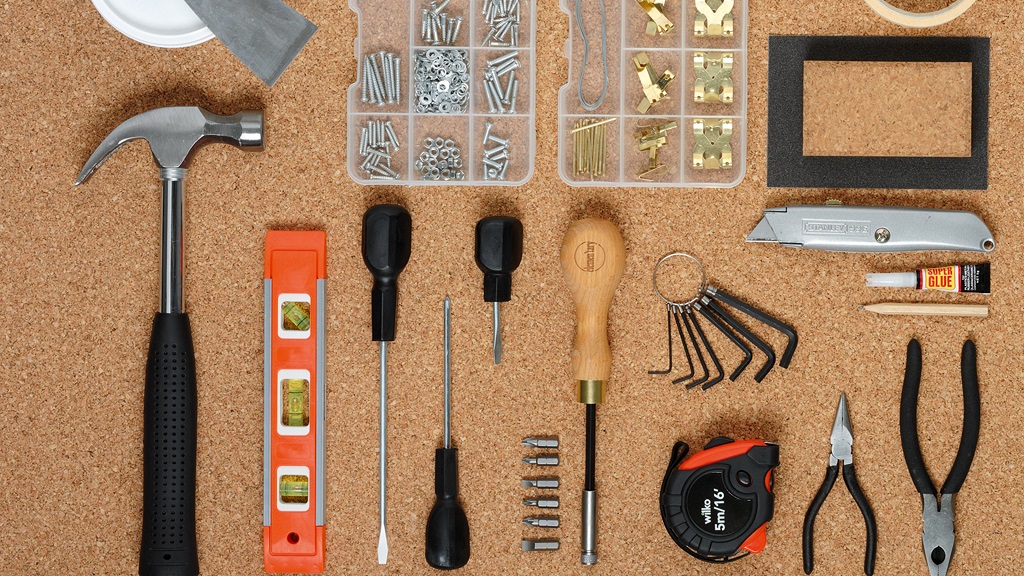
Having a well-stocked toolbox is the foundation of any successful DIY project. Here are the essential tools to get you started:
-
Measuring and Marking:
- Tape Measure: A reliable tape measure is a must-have for measuring materials, distances, and spaces. Choose one with a comfortable grip and easy-to-read markings.
- Level: Ensuring straight lines and plumb walls is crucial. A torpedo level for smaller projects and a long level for larger areas are valuable additions.
- Carpenter’s Square: This L-shaped tool helps create perfect 90-degree angles and ensures straight cuts.
-
Cutting Tools:
- Utility Knife: A versatile tool for cutting cardboard, drywall, and other materials. Choose blades that can be snapped or replaced for safety.
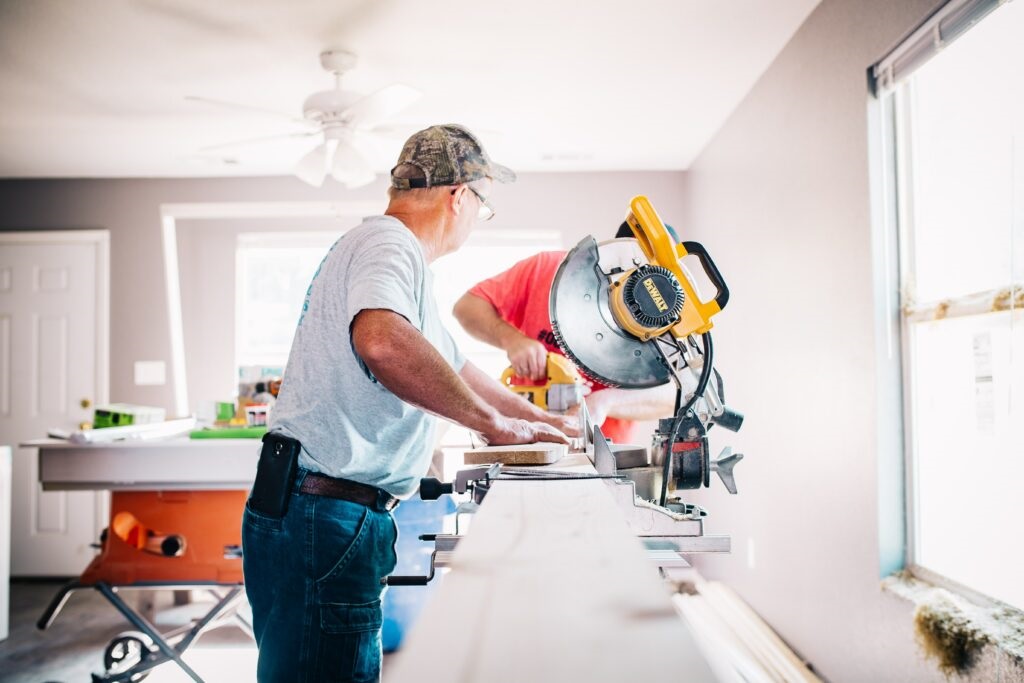
- Hand Saw: A hacksaw for metal, a coping saw for intricate cuts, and a handsaw for wood provide essential cutting capabilities.
- Safety Glasses: Always wear safety glasses when using cutting tools to protect your eyes from flying debris.
-
Fastening Tools:
- Hammer: A claw hammer for driving nails and removing them as needed is a basic requirement. Choose a weight that feels comfortable in your hand.
- Screwdrivers (Phillips and Flathead): These come in various sizes for driving and removing screws in different types of furniture and hardware.
- Drill/Driver: A cordless drill/driver with various drill bits and screwdriver attachments is a versatile tool for driving screws, drilling holes in wood, and making pilot holes for screws.
-
Other Essentials:
- Pliers (Regular and Needle-Nose): Useful for gripping objects of various sizes, tightening nuts and bolts, and bending wires.
- Adjustable Wrench: For tightening or loosening nuts and bolts of different sizes.
- Sandpaper: For smoothing rough surfaces before painting or staining. Various grits (rough to fine) offer versatility.
Essential Techniques Every Beginner Should Master:
Now that you have your toolbox stocked, let’s explore some fundamental techniques to get you started:
-
Measuring and Marking: This is the foundation of any successful project. Learn how to use your tape measure accurately and mark straight lines with a pencil and level.
-
Cutting: Mastering the proper cutting techniques with your chosen tools ensures clean cuts and reduces the risk of mistakes or injuries.
-
Drilling: Learn how to select the right drill bit for your material, use a pilot hole for screws to prevent splitting wood, and maintain proper drilling posture.
-
Fastening: Understand the differences between various screw types and their applications. Practice driving screws straight to avoid damaging materials or stripping screw heads.
-
Sanding: Learn how to use sandpaper effectively to achieve a smooth finish. Start with rougher grits to remove imperfections and progress to finer grits for a polished look.
-
Painting and Staining: Proper surface preparation, choosing the right paint or stain for your project, and applying it smoothly with a brush or roller are essential for a professional-looking finish.
Safety First: Essential Precautions for DIY Success
Safety should always be your top priority when tackling DIY projects. Here are some essential precautions to take:
-
Read Instructions: Always read and understand the instructions for any tools or materials you’re using before starting a project.
-
Wear Appropriate Safety Gear: Use safety glasses, gloves, and a dust mask when necessary to protect yourself from dust, debris, and potential injuries.
-
Use the Right Tool for the Job: Improvising with ill-suited tools can be dangerous and lead to damage or injury. Choose the right tool for the task at hand.
-
Work in a well-ventilated Area: When using paints, stains, or other materials that release fumes, ensure proper ventilation to avoid inhaling harmful substances.
-
Know Your Limits: Don’t attempt projects beyond your skill level or comfort zone. If something feels too complex, call a professional.
Beyond the Basics: Expanding Your DIY Skillset
As you gain confidence with basic tools and techniques, you can explore more advanced projects. Here are some resources to help you grow your DIY expertise:
- Online Tutorials: YouTube and other platforms offer a wealth
YouTube and other platforms offer a wealth of free video tutorials that visually demonstrate DIY techniques and project walkthroughs.
-
Home Improvement Websites and Blogs: Websites like https://www.thesprucecrafts.com/ and https://www.familyhandyman.com/ provide detailed instructions, troubleshooting tips, and project inspiration for various skill levels.
-
DIY Books and Magazines: Invest in beginner-friendly DIY books or subscribe to home improvement magazines for detailed project guides, expert advice, and creative inspiration.
-
Local Hardware Stores and Workshops: Many hardware stores offer workshops on various DIY topics, allowing you to learn from experienced professionals in a hands-on environment.
Related: Conquering the Dust Demons: A DIY Guide to Cleaning Air Ducts
The Power of DIY: Building Confidence and Personalizing Your Space
The world of DIY isn’t just about fixing leaky faucets or assembling furniture. It’s about empowering yourself, unlocking creativity, and transforming your space into a reflection of your personality and taste. The key is to start small, build confidence with basic projects, and celebrate your successes, no matter how minor.
Remember, the DIY journey is a continuous learning process. Embrace challenges, don’t be afraid to make mistakes (they’re valuable learning opportunities!), and most importantly, have fun! With a little practice and the right tools, you’ll be surprised at what you can accomplish and the satisfaction that comes from creating something yourself. So, grab your toolbox, unleash your inner handyman (or handywoman!), and embark on your DIY adventure!
Bonus Tips:
-
Work with a Friend: Tackling a project with a friend can be a fun and social experience. You can learn from each other, share tools and resources, and motivate each other to stay on track.
-
Document Your Progress: Taking pictures of your progress can help refer back to specific steps or troubleshooting issues.
-
Think Outside the Box: DIY isn’t limited to traditional home improvement projects. Explore upcycling furniture, creating decorative crafts, or personalizing your space with DIY wall art.
With dedication, a willingness to learn, and a touch of creativity, the world of DIY opens doors to countless possibilities. You can transform your home, empower yourself with valuable skills, and discover the joy of creation, all while saving money and fostering a sense of accomplishment. Happy DIYing!