Our homes are havens, but lurking unseen can be tiny invaders – dust bunnies and allergens trapped within the labyrinthine air ducts. While professional cleaning is an option, for the budget-conscious DIYer, tackling air ducts yourself offers a sense of accomplishment and potential cost savings. However, before we delve into the how-to, let’s understand why clean air ducts matter.
Why Clean Air Ducts?
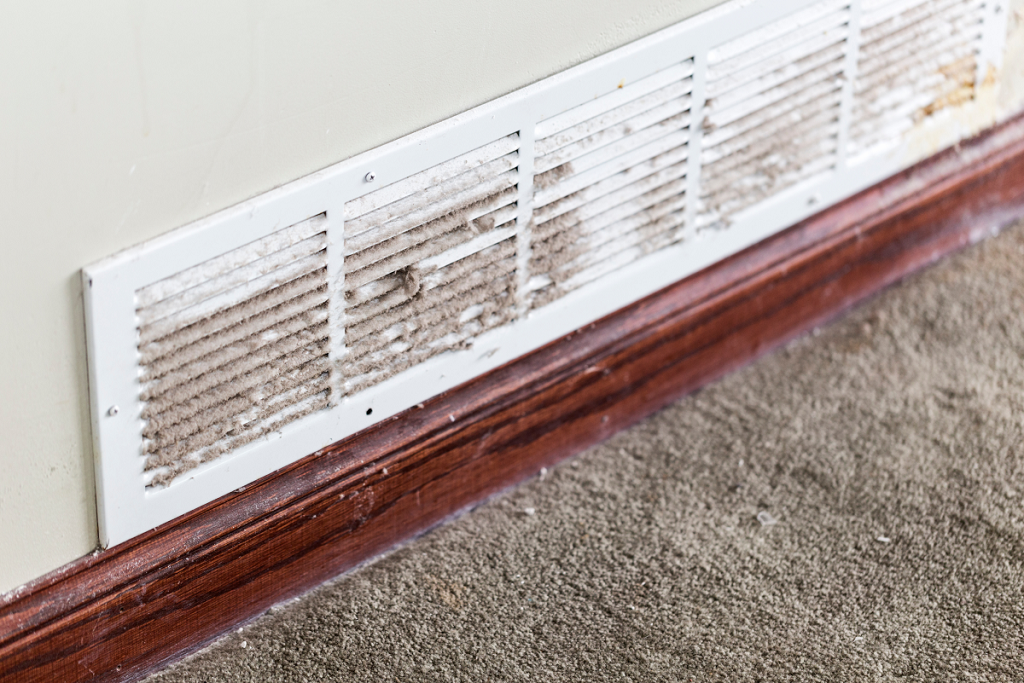
Imagine your air ducts as the lungs of your HVAC system. They silently transport conditioned air throughout your home, but over time, they accumulate dust, pet dander, and even mold spores. This buildup can:
- Reduce airflow: Clogged ducts force your HVAC system to work harder, leading to higher energy bills and potential equipment strain.
- Exacerbate allergies: Trapped allergens can irritate respiratory problems and allergies.
- Spread contaminants: When the system kicks on, dust and debris get redistributed throughout the house, potentially negating your cleaning efforts.
Signs You Might Need Duct Cleaning
Here are some telltale signs that your air ducts might be harboring dust bunnies:
- Increased dust levels: Notice dust accumulating more quickly after cleaning? This could be a sign of debris being circulated through the ducts.
- Rising allergy and asthma symptoms: Dust and allergens can worsen allergies and asthma.
- Visible mold growth: Mold thrives in damp environments. If you see mold near vents, it suggests potential mold growth within the ducts.
- Reduced airflow from vents: Weak airflow from vents indicates potential blockages.
Before You Begin: Assessing Suitability for DIY Cleaning
While DIY duct cleaning can be effective for basic dust removal, it has limitations. Here’s when it might be best to call in the professionals:
- Extensive ductwork: Complex duct systems with long stretches or tight bends are challenging to clean thoroughly with DIY methods.
- Rodent or vermin infestation: Animal droppings and nesting materials require professional removal and potential duct sealing.
- Mold growth concerns: Extensive mold growth requires professional remediation techniques to ensure complete removal and prevent further spread.
Safety First: Essential Precautions
Safety is paramount during any DIY project. Here’s what to keep in mind:
- Turn off the HVAC system: Always turn off the power to your HVAC system at the breaker box before starting any cleaning.
- Wear protective gear: A dust mask, gloves, and safety glasses are essential to protect yourself from dust and debris.
- Beware of sharp edges: Ductwork can have sharp edges. Wear gloves and be cautious while maneuvering inside vents.
Gathering Your DIY Air Duct Cleaning Arsenal
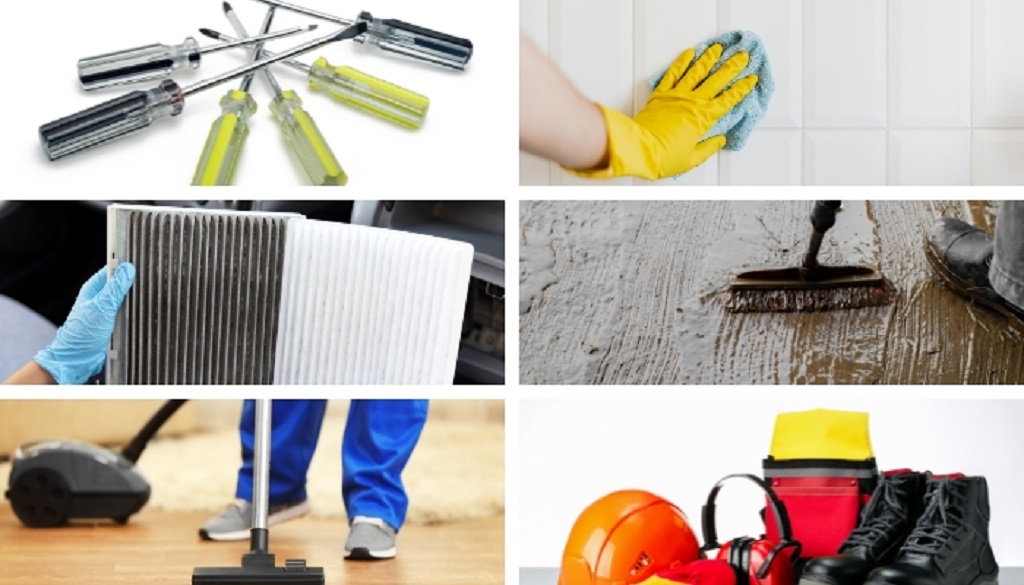
Now that you’ve assessed the suitability and prioritized safety, let’s assemble your cleaning toolkit:
- Screwdriver: To remove vent covers.
- Shop vacuum cleaner: A powerful vacuum with a hose attachment is ideal. Consider a HEPA-filtered vacuum for better dust capture.
- Long brush with extendable handle: A brush designed for cleaning vents or a radiator brush will work well.
- Microfiber cloths: For wiping down accessible duct surfaces.
- Drop cloths or plastic sheeting: To protect floors and furniture from dust.
- Duct cleaning snake (optional): For reaching deeper into ducts (use with caution to avoid damaging ducts).
- Flashlight: To illuminate the interior of ducts.
Step-by-Step Guide to DIY Air Duct Cleaning
- Preparation is Key: Turn off the HVAC system and circuit breaker. Cover furniture and electronics with drop cloths or plastic sheeting.
- Vent Cover Removal: Using your screwdriver, carefully remove the vent covers. Wash them thoroughly with warm, soapy water and let them dry completely.
- Loosen the Dust: Set your HVAC system’s fan to “on” (with heating and cooling turned off). This will circulate air and help loosen dust within the ducts. Let it run for 10-15 minutes.
- Vacuum Power: With the fan still running, insert the hose attachment of your vacuum cleaner as far as possible into the vents. Slowly pull the hose back while brushing the sides of the duct with your extendable brush. This will dislodge dust and debris, which gets sucked up by the vacuum.
- Cleaning the Ducts (Optional): For a more thorough clean, consider using a duct cleaning snake. Insert it carefully into the duct, then slowly pull it back while brushing the interior. Caution: Duct snakes can damage ducts if used forcefully. Use them with care and only if you have accessible and straight ductwork.
- Wipe Down Accessible Areas: Use a damp microfiber cloth to wipe down any accessible surfaces within the duct.
The Final Touches and Post-Cleaning Maintenance
- Repeat for Each Vent: Move systematically from vent to vent, repeating steps 4-6.
- Cleaning the Vacuum Filter: Dust dislodged from the ducts will clog your vacuum filter. Empty and clean the filter according to the manufacturer’s instructions. Consider replacing a heavily clogged filter.
- Replace Vent Covers: Once everything is clean and dry, reattach the vent covers securely.
- Turn On the System: Turn the HVAC system back on at the breaker box and thermostat. It’s normal to experience a slight puff of dust initially as the system restarts.
Prolonging Fresh Air: Post-Cleaning Maintenance
- Regular Vacuuming: Regularly vacuum carpets and furniture to minimize dust and debris entering your air ducts.
- Change Air Filters Regularly: Replace air filters according to the manufacturer’s recommendations, typically every 1-3 months. A clean air filter helps prevent dust from entering the ductwork in the first place.
- Consider Professional Cleaning (if needed): If you notice significant dust buildup after cleaning, have limited access to ducts, or suspect mold growth, consider hiring a professional duct cleaning service.
DIY Duct Cleaning: A Rewarding Endeavor
By following these steps and prioritizing safety, you can successfully tackle basic air duct cleaning yourself. Remember, DIY cleaning may not address extensive dust buildup or complex duct systems. However, for a budget-friendly and proactive approach to maintaining good indoor air quality, DIY air duct cleaning can be a rewarding project. Breathe easy, knowing you’ve taken a step towards a cleaner, healthier home environment.
Additional Tips and Considerations
- Scheduling: The ideal time for DIY duct cleaning is before your HVAC system’s peak usage season (heating or cooling).
- Working with Others: If you have a large home or complex ductwork, consider tackling the project with a helper for efficiency and safety.
- Documenting Your Work: Taking pictures before and after cleaning can help assess the effectiveness of your efforts.
- Eco-Friendly Alternatives: For those with allergies to dust, consider using a HEPA air purifier in conjunction with regular cleaning to improve indoor air quality.
Related: How to Install Smart Lighting
By following these guidelines and considerations, you can empower yourself to tackle DIY air duct cleaning with confidence. Remember, a clean and well-maintained HVAC system not only improves indoor air quality but also promotes energy efficiency and extends the lifespan of your equipment. So, grab your tools, embrace the challenge, and enjoy the satisfaction of a cleaner, healthier breathing environment!