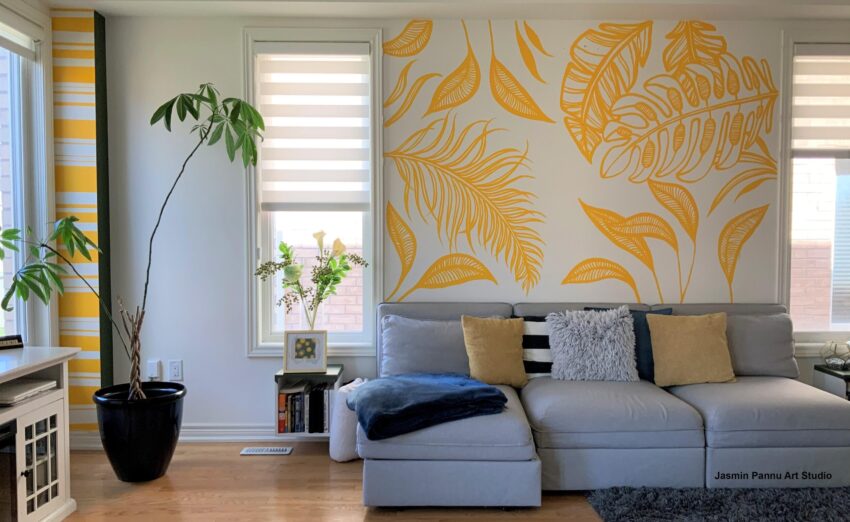
If you are looking to add a personal touch to your home decor, then creating wall paint art can be a fun and creative way to do so. Not only is it a great way to express your artistic side, but it can also add a unique flair to any room in your home. In this article, we will go over the steps on how to create your own DIY wall paint art.
Materials Needed
Before you start your project, you will need to gather the necessary materials. Here is a list of materials you will need:
- Painter’s tape
- Paintbrushes (various sizes)
- Paint rollers
- Paint trays
- Drop cloths
- Canvas or another surface to paint on
- Acrylic or latex paint (various colors)
- Stencils (optional)
Steps
Step 1: Choose Your Design
The first step in creating your DIY wall paint art is to choose your design. You can either create your own design or find inspiration online. Websites like Pinterest and Instagram can be great sources of design inspiration. Once you have chosen your design, you can then decide on the colors you want to use.
Step 2: Prepare the Surface
After you have chosen your design and colors, you will need to prepare the surface you will be painting on. If you are painting on a wall, make sure to clean it thoroughly and let it dry completely. You should also cover the surrounding area with drop cloths to protect it from paint splatters.
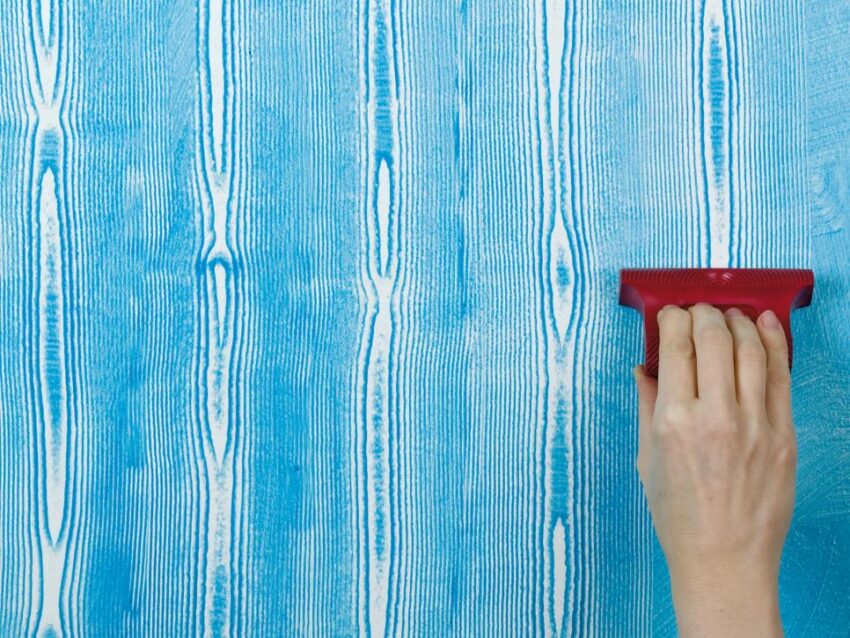
Step 3: Apply Painter’s Tape
Using painter’s tape, create an outline of the design you have chosen. This will ensure that your design is neat and precise. Make sure the tape is pressed down firmly to prevent any paint from bleeding through.
Step 4: Apply the Base Coat
Using a paint roller, apply a base coat of paint to the area inside the painter’s tape. Let the paint dry completely before moving on to the next step.
Step 5: Add Details
Once the base coat is dry, you can start adding details to your design. Use a small paintbrush to add the details, or use stencils if you are not confident in your painting abilities.
Step 6: Remove the Painter’s Tape
After you have finished painting your design, let the paint dry completely before removing the painter’s tape. Slowly and carefully remove the tape to reveal your finished design.
Step 7: Touch Up
If there are any areas that need a touch-up, use a small paintbrush to fix any mistakes. Let the paint dry completely before adding any additional layers.
Step 8: Seal the Design
To protect your design, you can seal it with a clear coat of paint or a sealant. This will prevent the paint from chipping or fading over time.
Tips for Success
- Use high-quality paint to ensure the best results.
- Don’t rush the painting process. Take your time and work carefully to create a neat and precise design.
- Practice on a small area first before painting a larger area.
- Use a variety of brush sizes to add depth and texture to your design.
- Experiment with different painting techniques to create a unique and interesting design.
Conclusion
Creating your own DIY wall paint art can be a fun and creative way to add a personal touch to your home decor. By following these steps and tips, you can create a beautiful and unique design that will impress your friends and family.