If you’re tired of cluttered garage floors and want to organize your tools and equipment, building garage shelves from 2x4s is a cost-effective and practical solution. In this article, we’ll guide you through the process of building garage shelves from 2x4s, from planning and measuring to cutting and assembly.
Materials Needed
Before we begin, you’ll need to gather the following materials:
- 2×4 lumber
- Plywood or MDF board
- Wood screws
- Wood glue
- Drill
- Circular saw
- Measuring tape
- Level
- Pencil
- Safety glasses
- Work gloves
Planning and Measuring
The first step in building garage shelves is to plan and measure the space where you want to install them. Start by measuring the length, width, and height of the area. This will help you determine how much lumber and plywood you’ll need to purchase.
Next, decide how many shelves you want to install and how far apart you want them to be. A good rule of thumb is to space the shelves about 12-16 inches apart. Once you have determined the spacing, measure and mark the locations of the shelves on the wall using a level and a pencil.
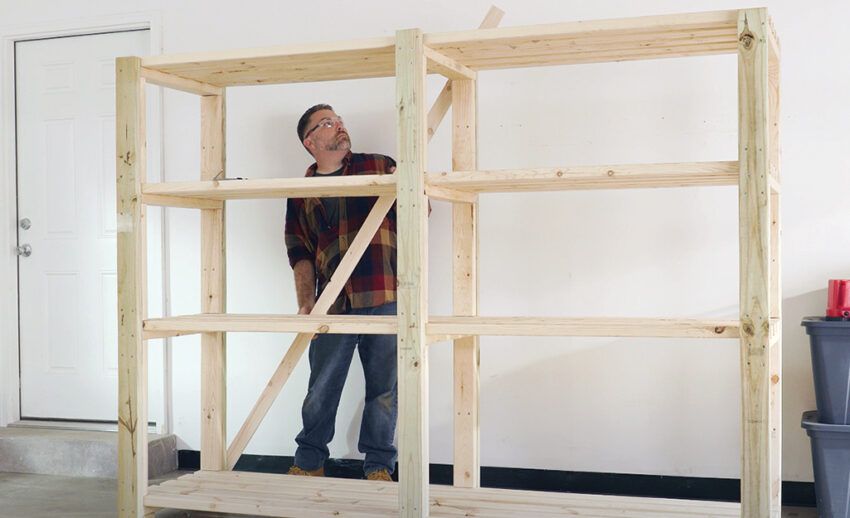
Cutting the Lumber and Plywood
Once you have your measurements and spacing figured out, it’s time to cut the lumber and plywood to size. Using a circular saw, cut the 2x4s to the length of the shelves and the height of the vertical supports. Cut the plywood or MDF board to the size of the shelves.
It’s important to wear safety glasses and work gloves when cutting the lumber and plywood to avoid injury.
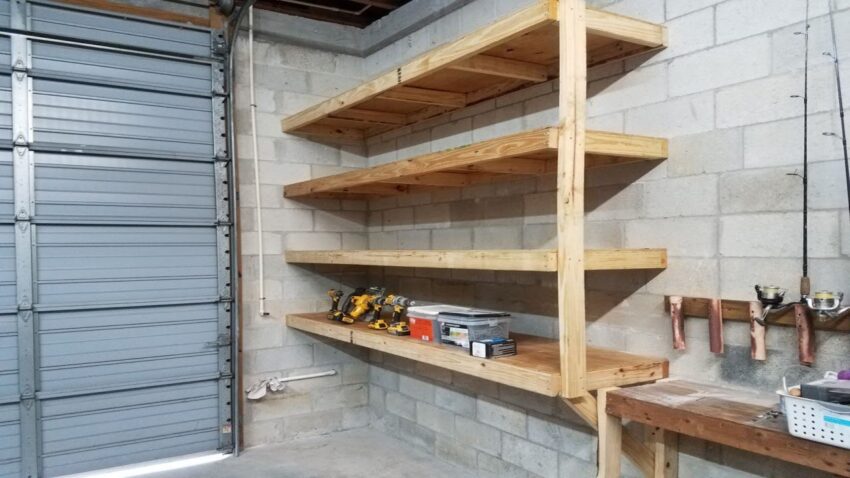
Assembly
With all the materials cut to size, it’s time to assemble the garage shelves. Start by attaching the vertical supports to the wall using wood screws. Use a level to ensure the supports are level and plumb.
Next, attach the horizontal supports to the vertical supports using wood screws and wood glue. Make sure the shelves are level and evenly spaced.
Finally, attach the plywood or MDF board to the horizontal supports using wood screws and wood glue. Sand any rough edges and apply a coat of paint or sealer to protect the wood from moisture and damage.
Tips and Tricks
- If you have a large collection of heavy tools, consider adding additional supports and thicker plywood or MDF board to hold the weight.
- Use a stud finder to locate the studs in the wall for a stronger support base.
- Label each shelf to help you stay organized and find what you need quickly.
Conclusion
Building garage shelves from 2x4s is a great way to create storage space and organize your garage. With the right tools and materials, it’s a project that can be completed in a day or two. By following the steps outlined in this article, you can create functional and durable shelves that will make your garage a more organized and efficient space.